Little thing on georeferencing and using historic maps/aerial imagery!
Map Warper (mapwarper.net) is a cool online tool that allows you to:
- Upload old maps and aerial imagery
- Georeference your old maps and aerial imagery
- Access your georeferenced map/imagery for use in a web map
- Download your georeferenced map/imagery as a GeoTIFF, PNG, or KML
- Go to http://mapwarper.net/ and create an account.
- Find and download some imagery or maps.
- David Rumsey Map Collection
- UK Map Library (For maps here, access the PDF version. The URL will be
<blahblah>.pdf. Replacepdfwithjpgand reload.) - USGS
- We'll be using a sheet from the 1920 Sanborn maps of Lexington. You can access the image in the repo (mapwarper-lex-example.jpg).
- On the Map Warper homepage, click the Upload Map tab.
- Under Upload a new map there are several metadata fields you can fill in. Title, Description, and Tags are required, but it's good practice to try and fill in as many of the other fields as you can.
- Once you're finished filling in the metadata, click the Choose File button at the bottom of your page, select the image you want to georeference and click Create. (Note: It may take a few moments for your image to upload.)
- Once your map is uploaded it will show up in the Show tab. Pan around and zoom in on it. It probably looks pretty nice! But it's not georeferenced and thus not living up to its full cartographic potential!
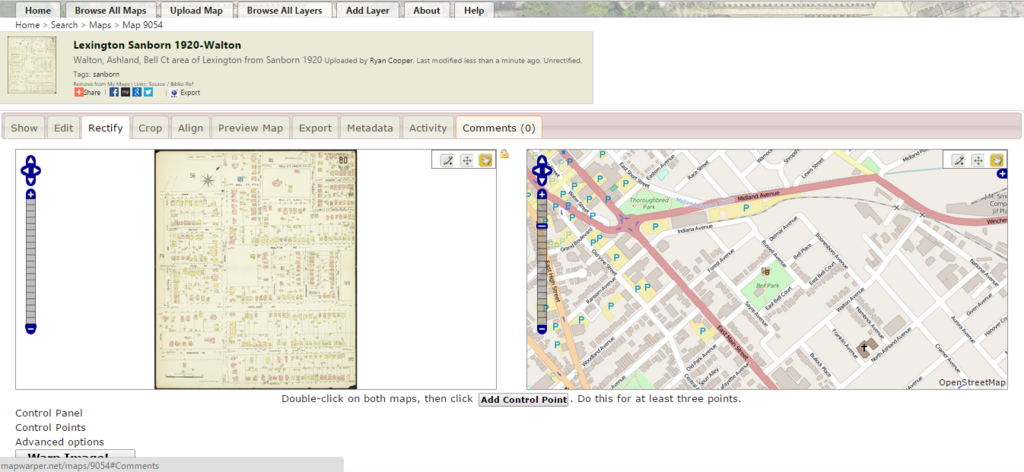
- Click the Rectify tab. You will see on the left your map and on the right OpenStreetMap (OSM) centered on Null Island. Zoom out in the OSM tab so you can see the USA and then zoom into the area covered by your map.
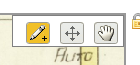
- The Rectify interface has three buttons. From left to right they are "Add Control Point," "Move Control Point," and "Move Around Map".
Go ahead and look at these great buttons! - Control points perhaps the most important part of georeferencing. When you add a control point to the image you want to georeference, you'll also add a corresponding control point to the OSM map. When you do that, you're telling Map Warper, "That point I placed on my image is the same as that point on OSM." As you add more control points, Map Warper will be able to better adjust your image and line it up with the OSM basemap. So let's add control points!
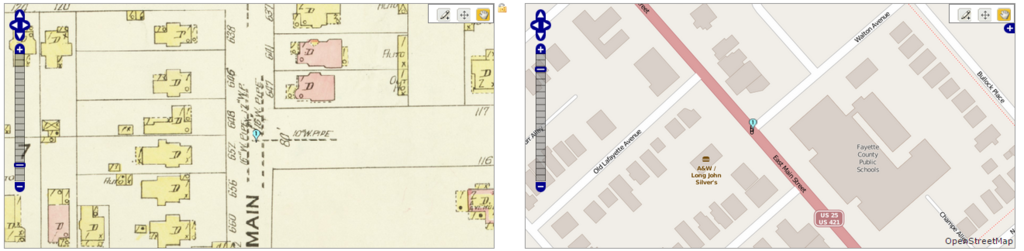
- In the left map pane, click the "Add Control Point" button (Pencil w/ a plus sign). Find a location in the image that you can find on the OSM basemap in the right map pane. Left-click. You should see a little marker with a number in it.
- Go over to the right map pane that contains the OSM basemap. Find the location in OSM that corresponds to the control point you just added to the image you're georeferencing. Left-click. You should see a marker with the same number as the one you just added in the left map pane. Those two points are now associated!
- You'll need to do steps 11 and 12 a few more times in order to properly line your image with the OSM basemap. You may need to click Add Control Point if there are no numbers in the markers you put down.
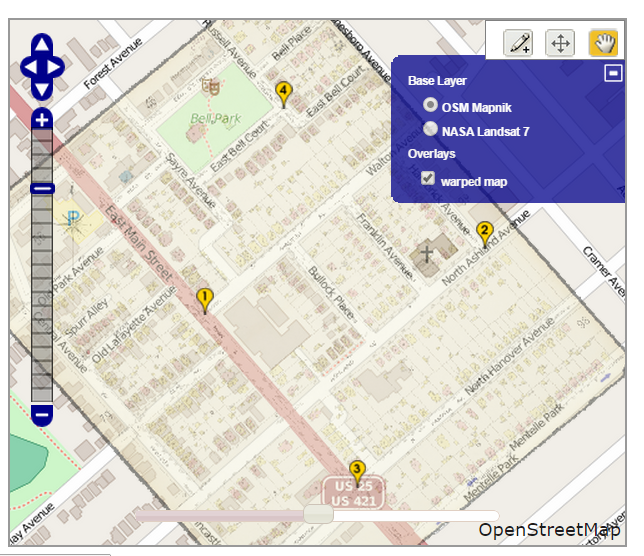
- When you've added a few control points and want to see how well your image lines up with the OSM basemap, click Warp Image! at the bottom of the page. It may take a second, but Map Warper is georeferencing your image according to the control points you established with the OSM basemap.
- If it doesn't show up automatically, you can view your map overlaying the OSM basemap in the right pane by clicking the plus sign in the top right corner of the right map pane, and under "Overlays" checking the "warped map" check box. This will turn on a semi-transparent overlay of your map atop OSM. You can adjust the transparency using the slider at the bottom of the right map pane.
- If you're happy with how your maps has been georeferenced, go on to the next step. However, you may find that your image doesn't quite match up with the basemap. Depending on the age, accuracy, and types of detail in your map, it may be unlikely that you can perfectly match up your map to the basemap, but you can get really close. At this stage you can repeat steps 11-13 and add more control points between your map and the OSM basemap.
- You can now download or reference your map for a project. Just click the Export tab and you'll see several options for how you can access your georeferenced map!